Valorant has fast become one of the most exciting Esports games. It is an arena shooter, but with distinct Agents to play as. Each offers different abilities and options for you. Deciding which agent to play as is a major part of mastering the game. Each is suited to a different type of player. Killjoy is the latest addition to Valorant and one of the most interesting Agents to date. Killjoy came into the came with Act 2, and has provided a major change to the game’s balance. This Killjoy guide covers what you need to know about the latest agent.
Killjoy’s abilities sit somewhere between Raze and Cypher, but with a little less damage. She is only the third Sentinel Agent in the game so far, so she definitely has a unique role. Killjoy had a few different abilities that use robots and gadgets to get more info and even deal some damage. This guide covers everything you need to know about playing as Killjoy in Valorant. This is what you need to know about the Agent, their abilities, or how to effectively play against her.
Killjoy Abilities Guide
Killjoy’s main difference to other Agents is her skills. You need to get to grips with all of them to win. This Killjoy guide to abilities covers everything you need to know to use these special powers at the right team, for maximum value.
Killjoy Guide – Alarmbot
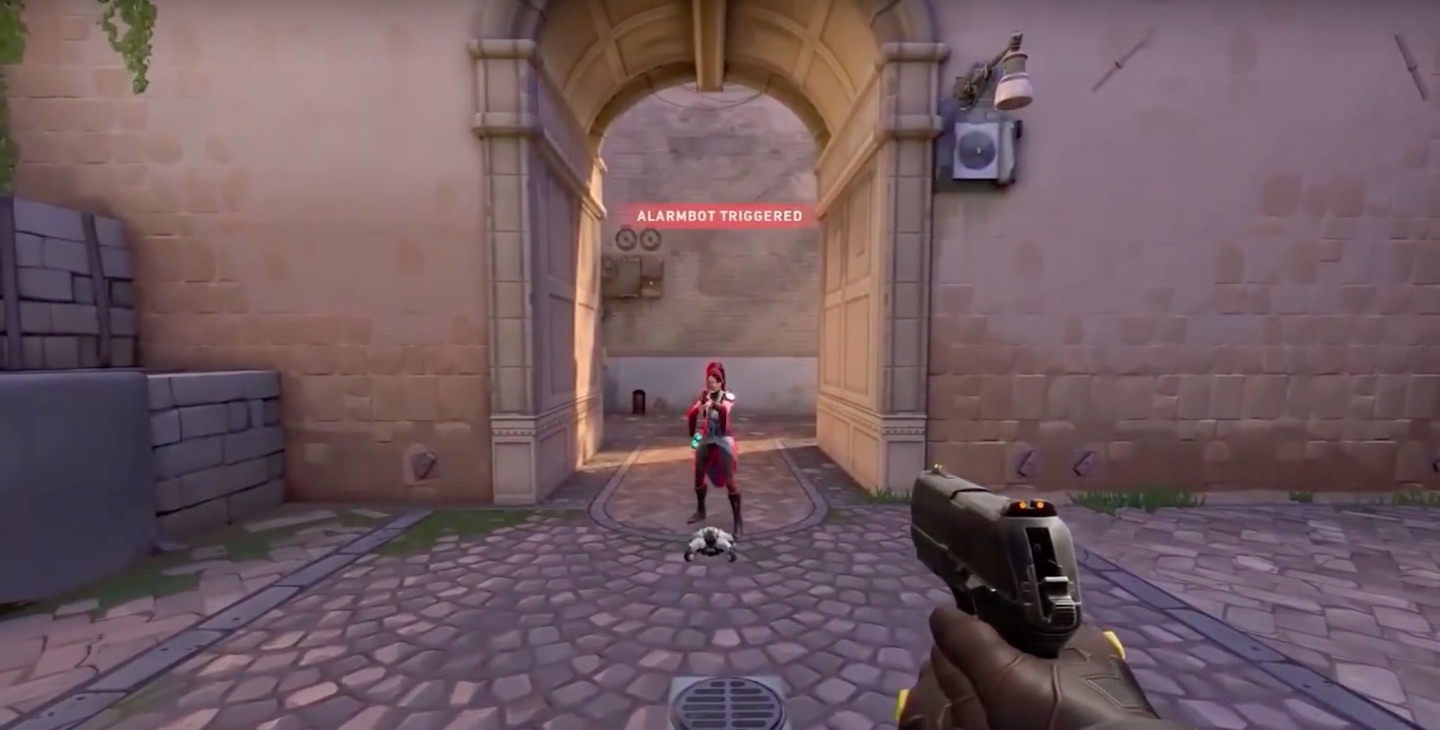
This is her first ability in this Killjoy guide. It is a stealth robot that is invisible until an enemy enters into its range. The robot acts as a mine, it sets off when an enemy comes into range of it. The explosion doesn’t do damage by itself though. Instead, it activates a debuff on the victim where they will receive double damage for around four seconds. This isn’t a huge amount of extra damage or a very long activation time. This doesn’t mean that it isn’t useful though.
You can see the range of the robot when you launch it out as a light blue circle. This can help you figure out where it is. In terms of taking advantage of the debuff, you need to set it off in a chokepoint where you’re expecting enemies to flood through. This makes it really useful for guarding your flank or even for setting attacking enemies up to fail when you’re on the defensive.
As well as the actual debuff, you can use this for info. Since it tells you when it’s activated, it serves as a notification that a player is coming out of a particular route. You can also call this ability back to yourself if you want to move it.
Killjoy – Nanoswarm
This is a grenade ability for Killjoy, it covers 200 credits and you can have up to 2 charges. You have to detonate it remotely like Cypher’s grenade, so this isn’t great for fragging. It’s more for thought out and tactical plays. This ability does deal damage and a fair amount of it but it is a lot more circumstantial.
Once set off, it gives some damage especially if another player doesn’t get out of the way soon enough. It can be noticed by other players if they’re close enough, so this isn’t an entire stealth bomb that you can set off. This ability can’t be recalled either, so you’ve really got to commit to its placement. This one of Killjoy’s abilities is best used in co-operation with the rest of your team. It can be served to basically add a load of extra damage onto a hot spot on the map. This is definitely one of the least interesting abilities in this Killjoy guide, but it does have a few benefits.
Killjoy Guide – Turret
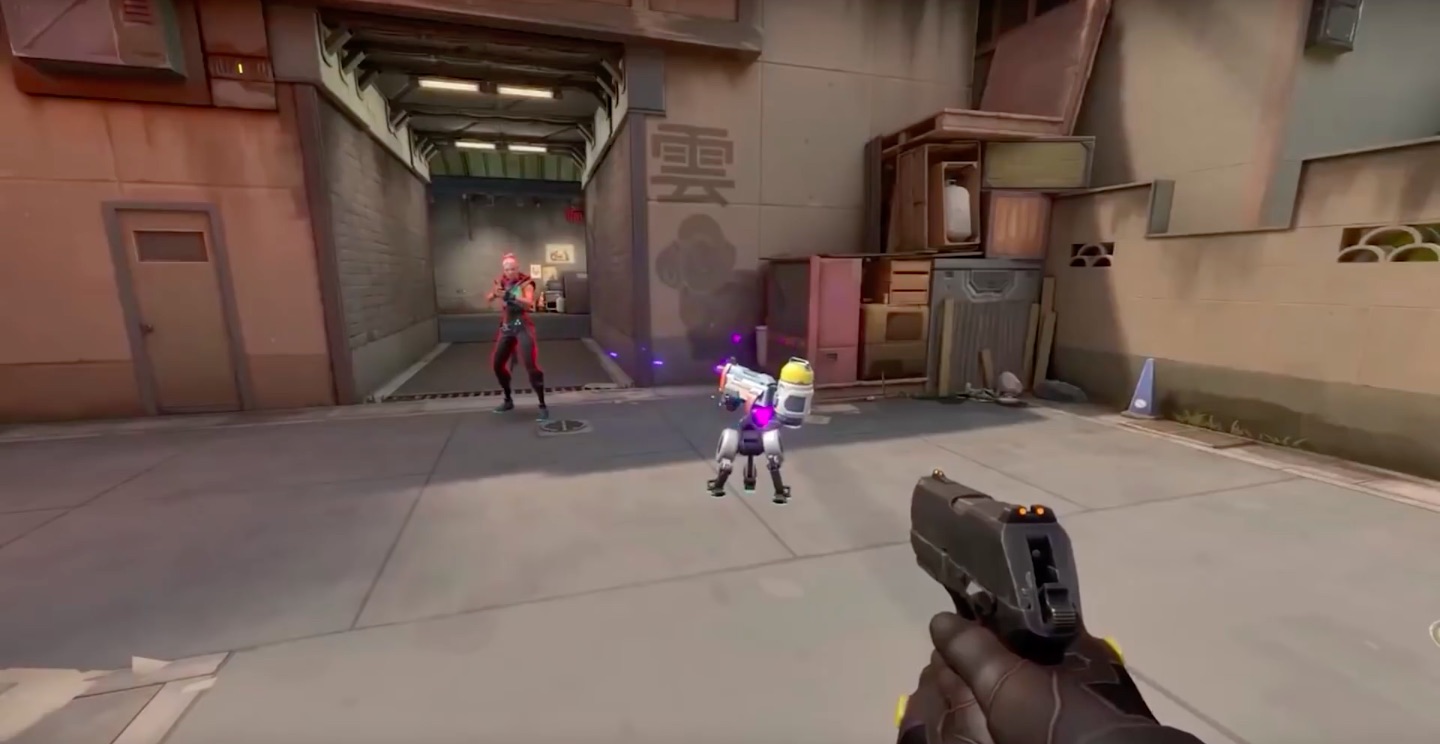
This is Killjoy’s free ability, and you can use it again 45 seconds after its destroyed or 20 seconds after it is called back. This is a turret that turns and shoots in a 180-degree cone shape. The turret is automatically placed faced outward, but you can turn it. You should try to place it in the right way the first time though, to save on extra wasted time after.
The Turret has a set amount of HP and does a certain amount of damage which limits its usefulness. It has 125 HP, and it shoots in three-shot bursts with a delay of less than a second in between the bursts. It deals 8 damage per bullet up to 20m away, 6 to 20-35m away, and 4 damage when enemies are 35m or more away.
So this balances out as it being more of annoyance far away, and the turret is a bit squishy to be useful up close and personal. It doesn’t do a massive amount of damage or anything, but it still helps you out and gives opponents another target for a few seconds.
You can use this in a few different ways, pushing back enemies that are attacking, complicating attacks, protecting a flank, or putting pressure on an enemies’ flank. It can also be an audio queue of enemies on your own flank. You can call it back at any time, which might be a good idea if your team is particularly mobile. Even if this doesn’t do a whole lot of damage, it can soak up enemy fire and draw their attention for a little while.
Killjoy Guide – Lockdown
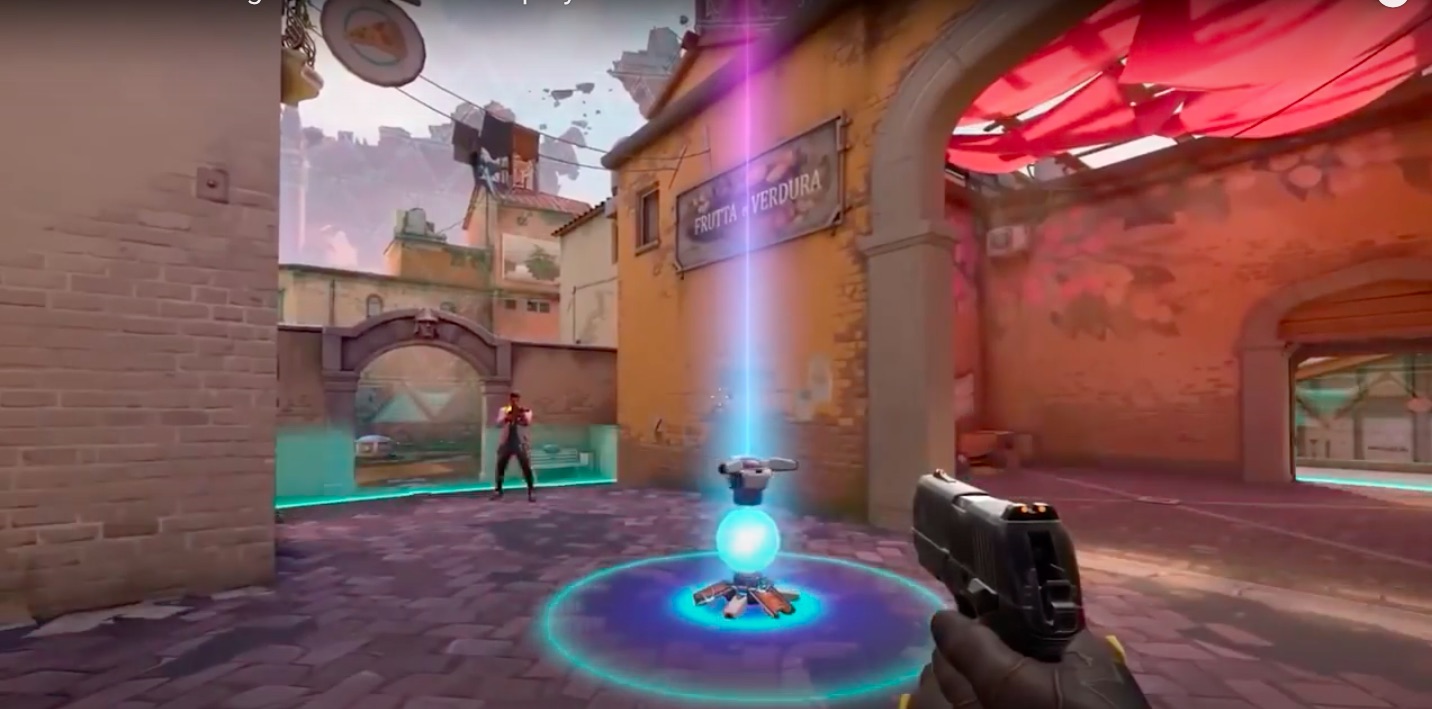
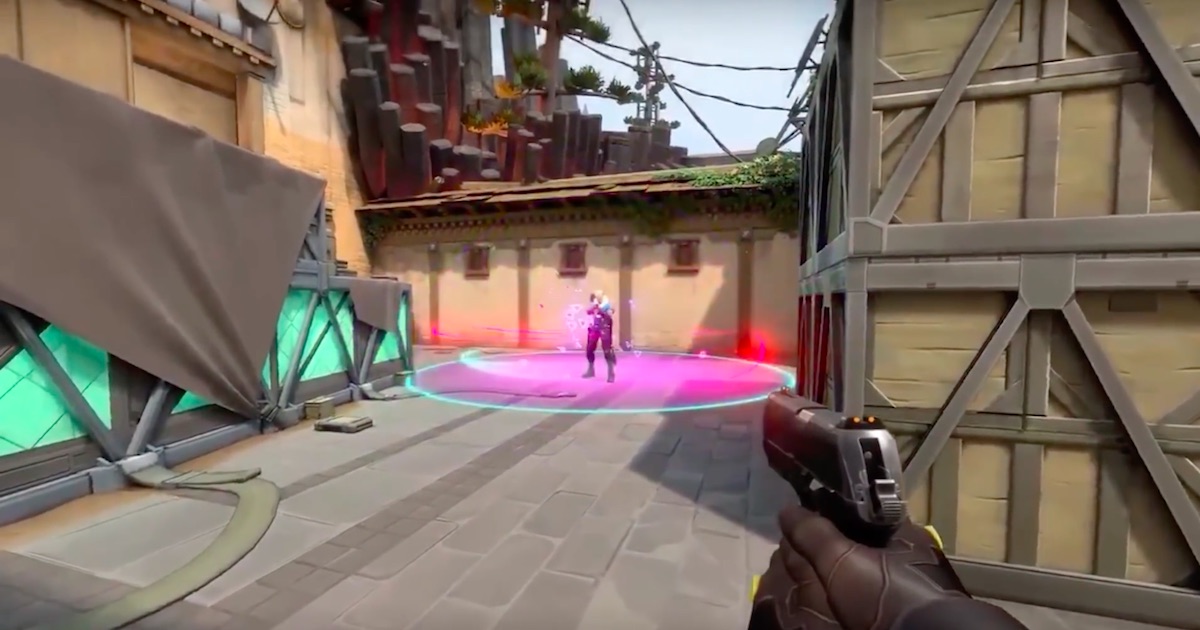
Lockdown is Killjoy’s ultimate. It is a device that emits out a dome in a large radius, this locks down and detains all of the enemies that are trapped inside of it. It can be destroyed by your enemies, but you don’t need line of sight to use it. This opens things up when you’re placing it in some odder places on the map. The bubble dome has a really big range. This makes it really useful for controlling areas on the map or zoning.
You can use this in a lot of different ways since its so big. You can get some safety, but also push and zone enemies into a specific spot for the offensive. This might work better defensively, but effective Killjoy players will use it for controlling the map in any way. It can be really great for keeping everyone locked up while you’re dealing with the spike.
Valorant Killjoy Tips and Tricks
These are some of the core tips and tricks that you’re going to need to win more matches as Killjoy in Valorant:
- Killjoy works great for taking control of areas rather than pushing. Ideally, you’ll need a lot of knowledge of the maps and how players tend to flow around them to make use of their abilities.
- Killjoy’s abilities can be irritating in their wind up and prep time. This makes Killjoy better for defensive maneuvers.
- On the attack, she isn’t as useful. However, some of her abilities will put extra pressure on the enemies you’re attacking. You can particularly use them well to establish a second line of attack from a flank.
- Combining Nanoswarm and Alarmbot can be really strong and get a kill, but it is an expensive way to use a lot of abilities at once.
- Lockdown’s duration is about half as long as it takes to defuse the spike. This is big, take advantage of it.
If you’re looking to get better at Valorant then our other guides to the game can help you improve other aspects:
- Best Beginner Valorant Agents – Who to Play First
- Which Valorant Agent Should I Play?
- How to Unlock All Valorant Agents
- Best Valorant Weapons Guide
- The Best Valorant PC Settings
- Valorant Economy Guide